January 23, 2026 • Keegan Ryan
Session View vs Arrangement View for Backing Tracks: Which Should You Use?
What Each View Is Actually Built For
Arrangement View or Session View. Many call this the Left Twix or Right Twix debate of modern-day live sound and production. Many will say that I made that up as I was writing this.
Two different views, two different experiences with Ableton. On the surface, it might seem obvious that Session View is best for live looping and Arrangement View is best for studio production—but it’s not that simple when the goal is playing back multitracks for a band. This article will give you a clear picture of when to use each view, plus the strengths and drawbacks of both—thus settling the debate once and for all.
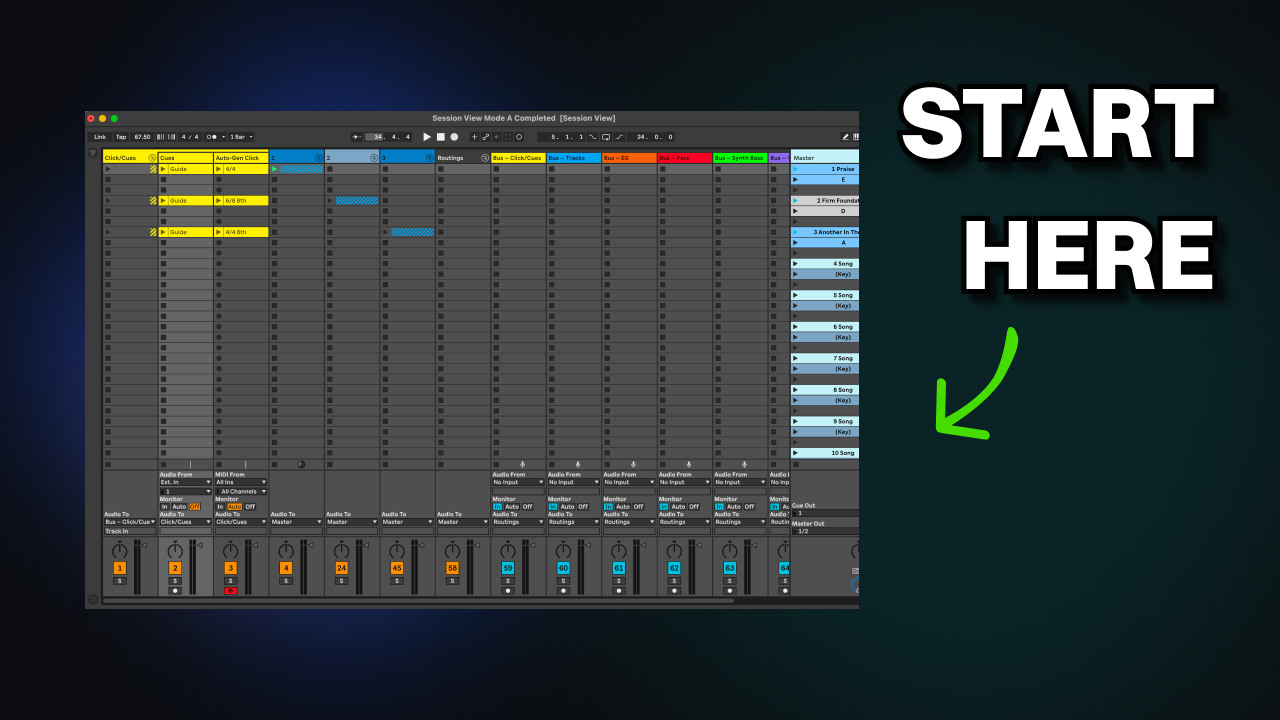
Session View
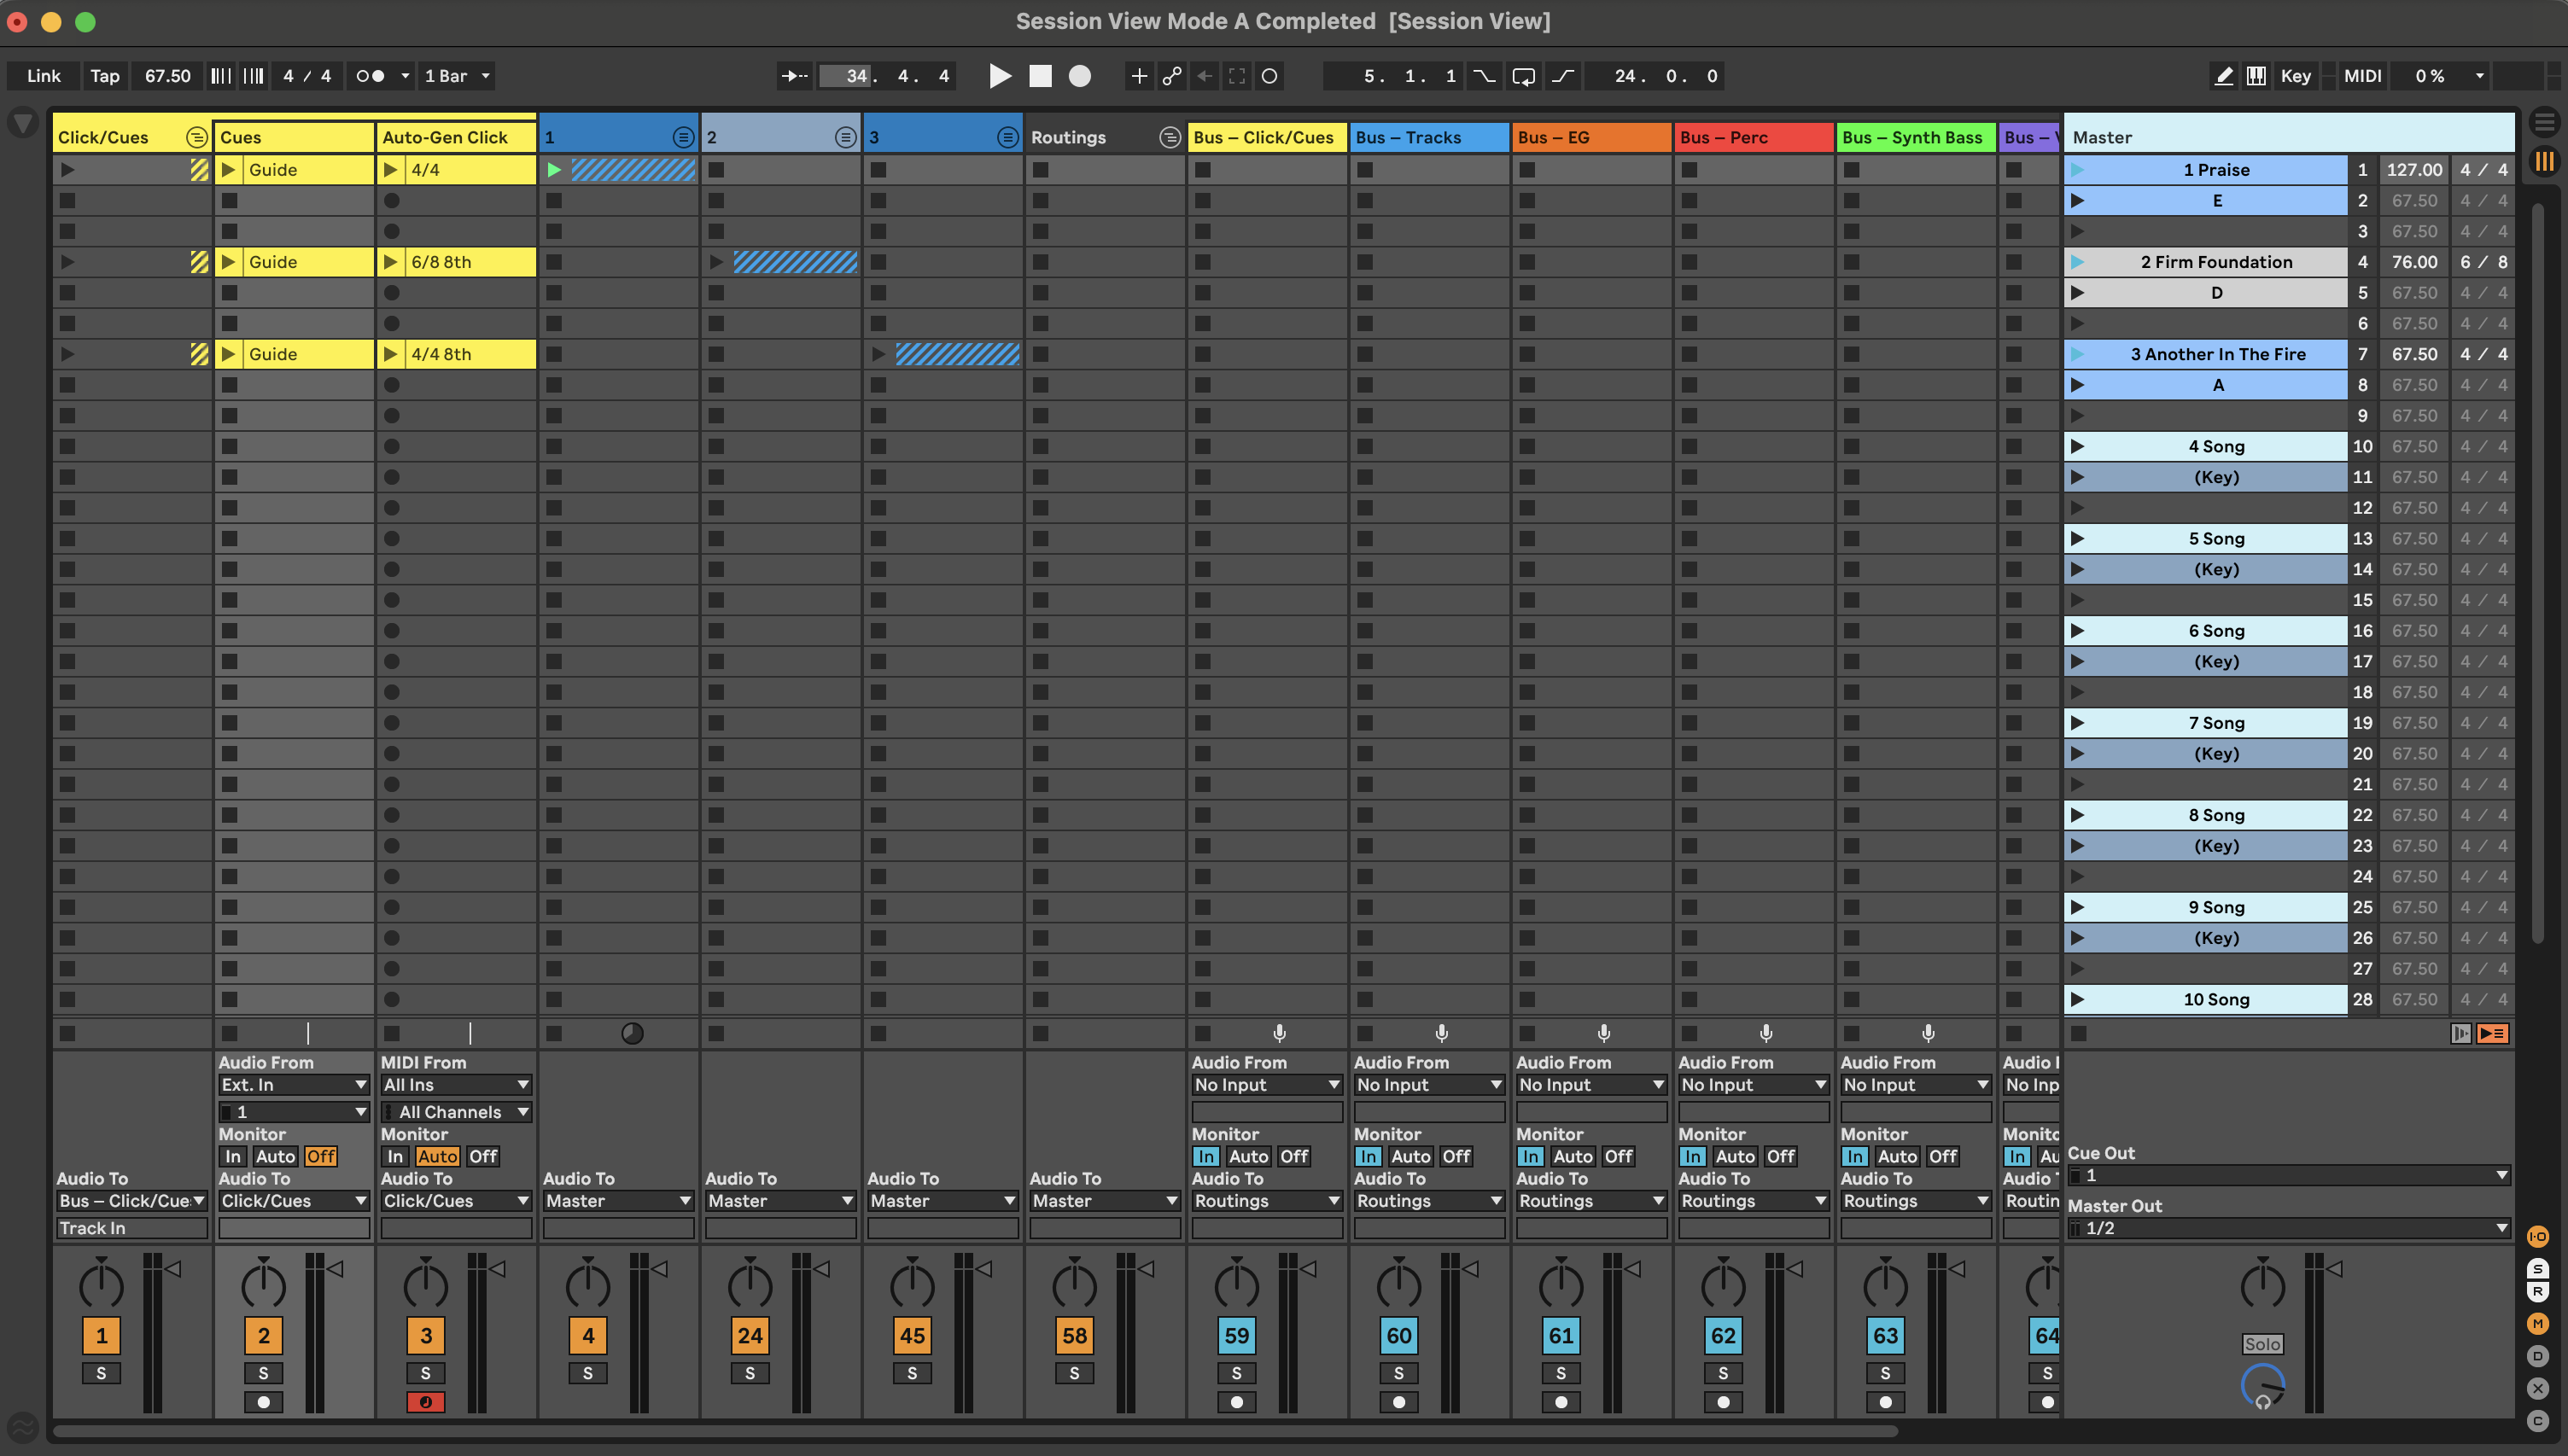
This is the crisp cookie, chewy caramel of Ableton.
It is what live playback was always meant to be.
Session View gives you clear slots for audio clips, plus scenes that match the order of your setlist. Simply enter your setlist (song names, BPM, time signature) in the scenes on the right, then drag your clips into the correct slot on each track. From there, you can warp, transpose if needed, and your multitracks are ready for playback.
Session View is also very friendly to volunteers or inexperienced users because they can easily see which scene triggers which song on the right-hand side.
There would be no debate if not for two crucial things many teams want: the ability to edit clips in depth, and the ability to add markers for song sections.
There really is no efficient way, for example, to add a double chorus in the middle of a track. And jumping between sections of the song? Forget it.
However, if neither of those things are crucial for your team, then Session View is by far the easiest way to build a multitracks session. And it’s the view of my choice each week—the view I intuitively reach for when building a session, just like the Right Twix bar I intuitively reach for when I want to rack up on calories.
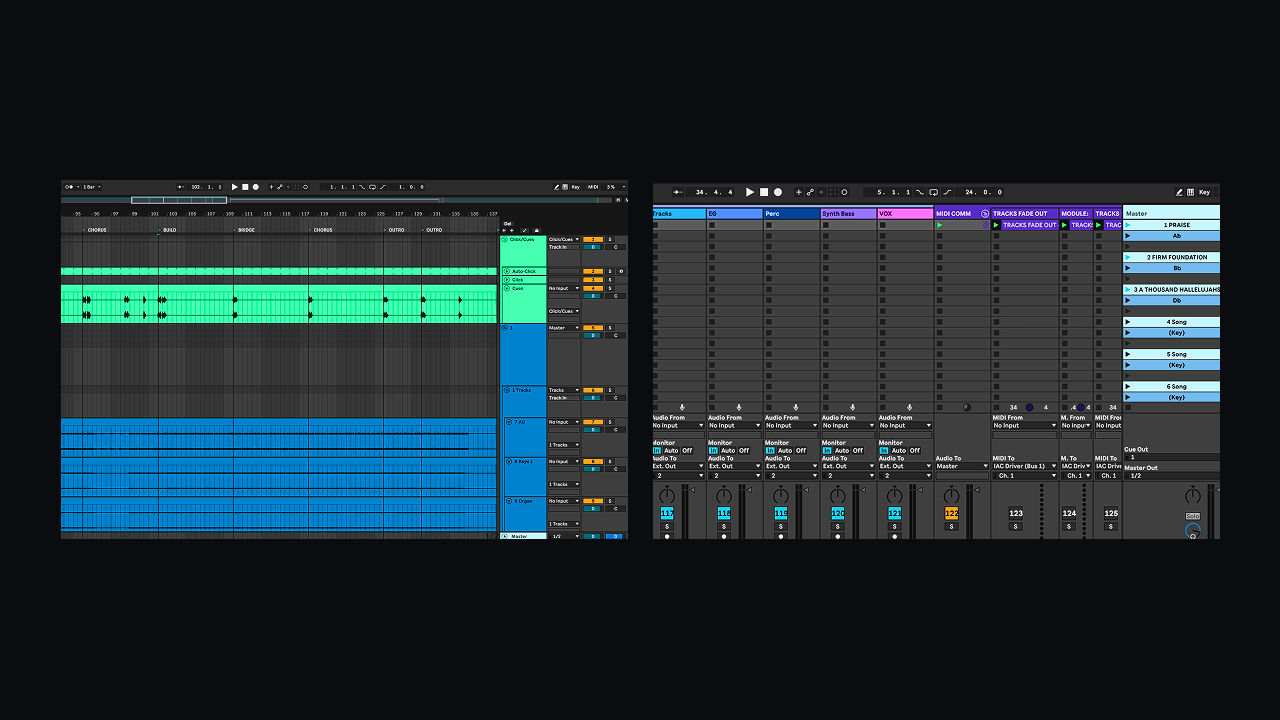
Arrangement View
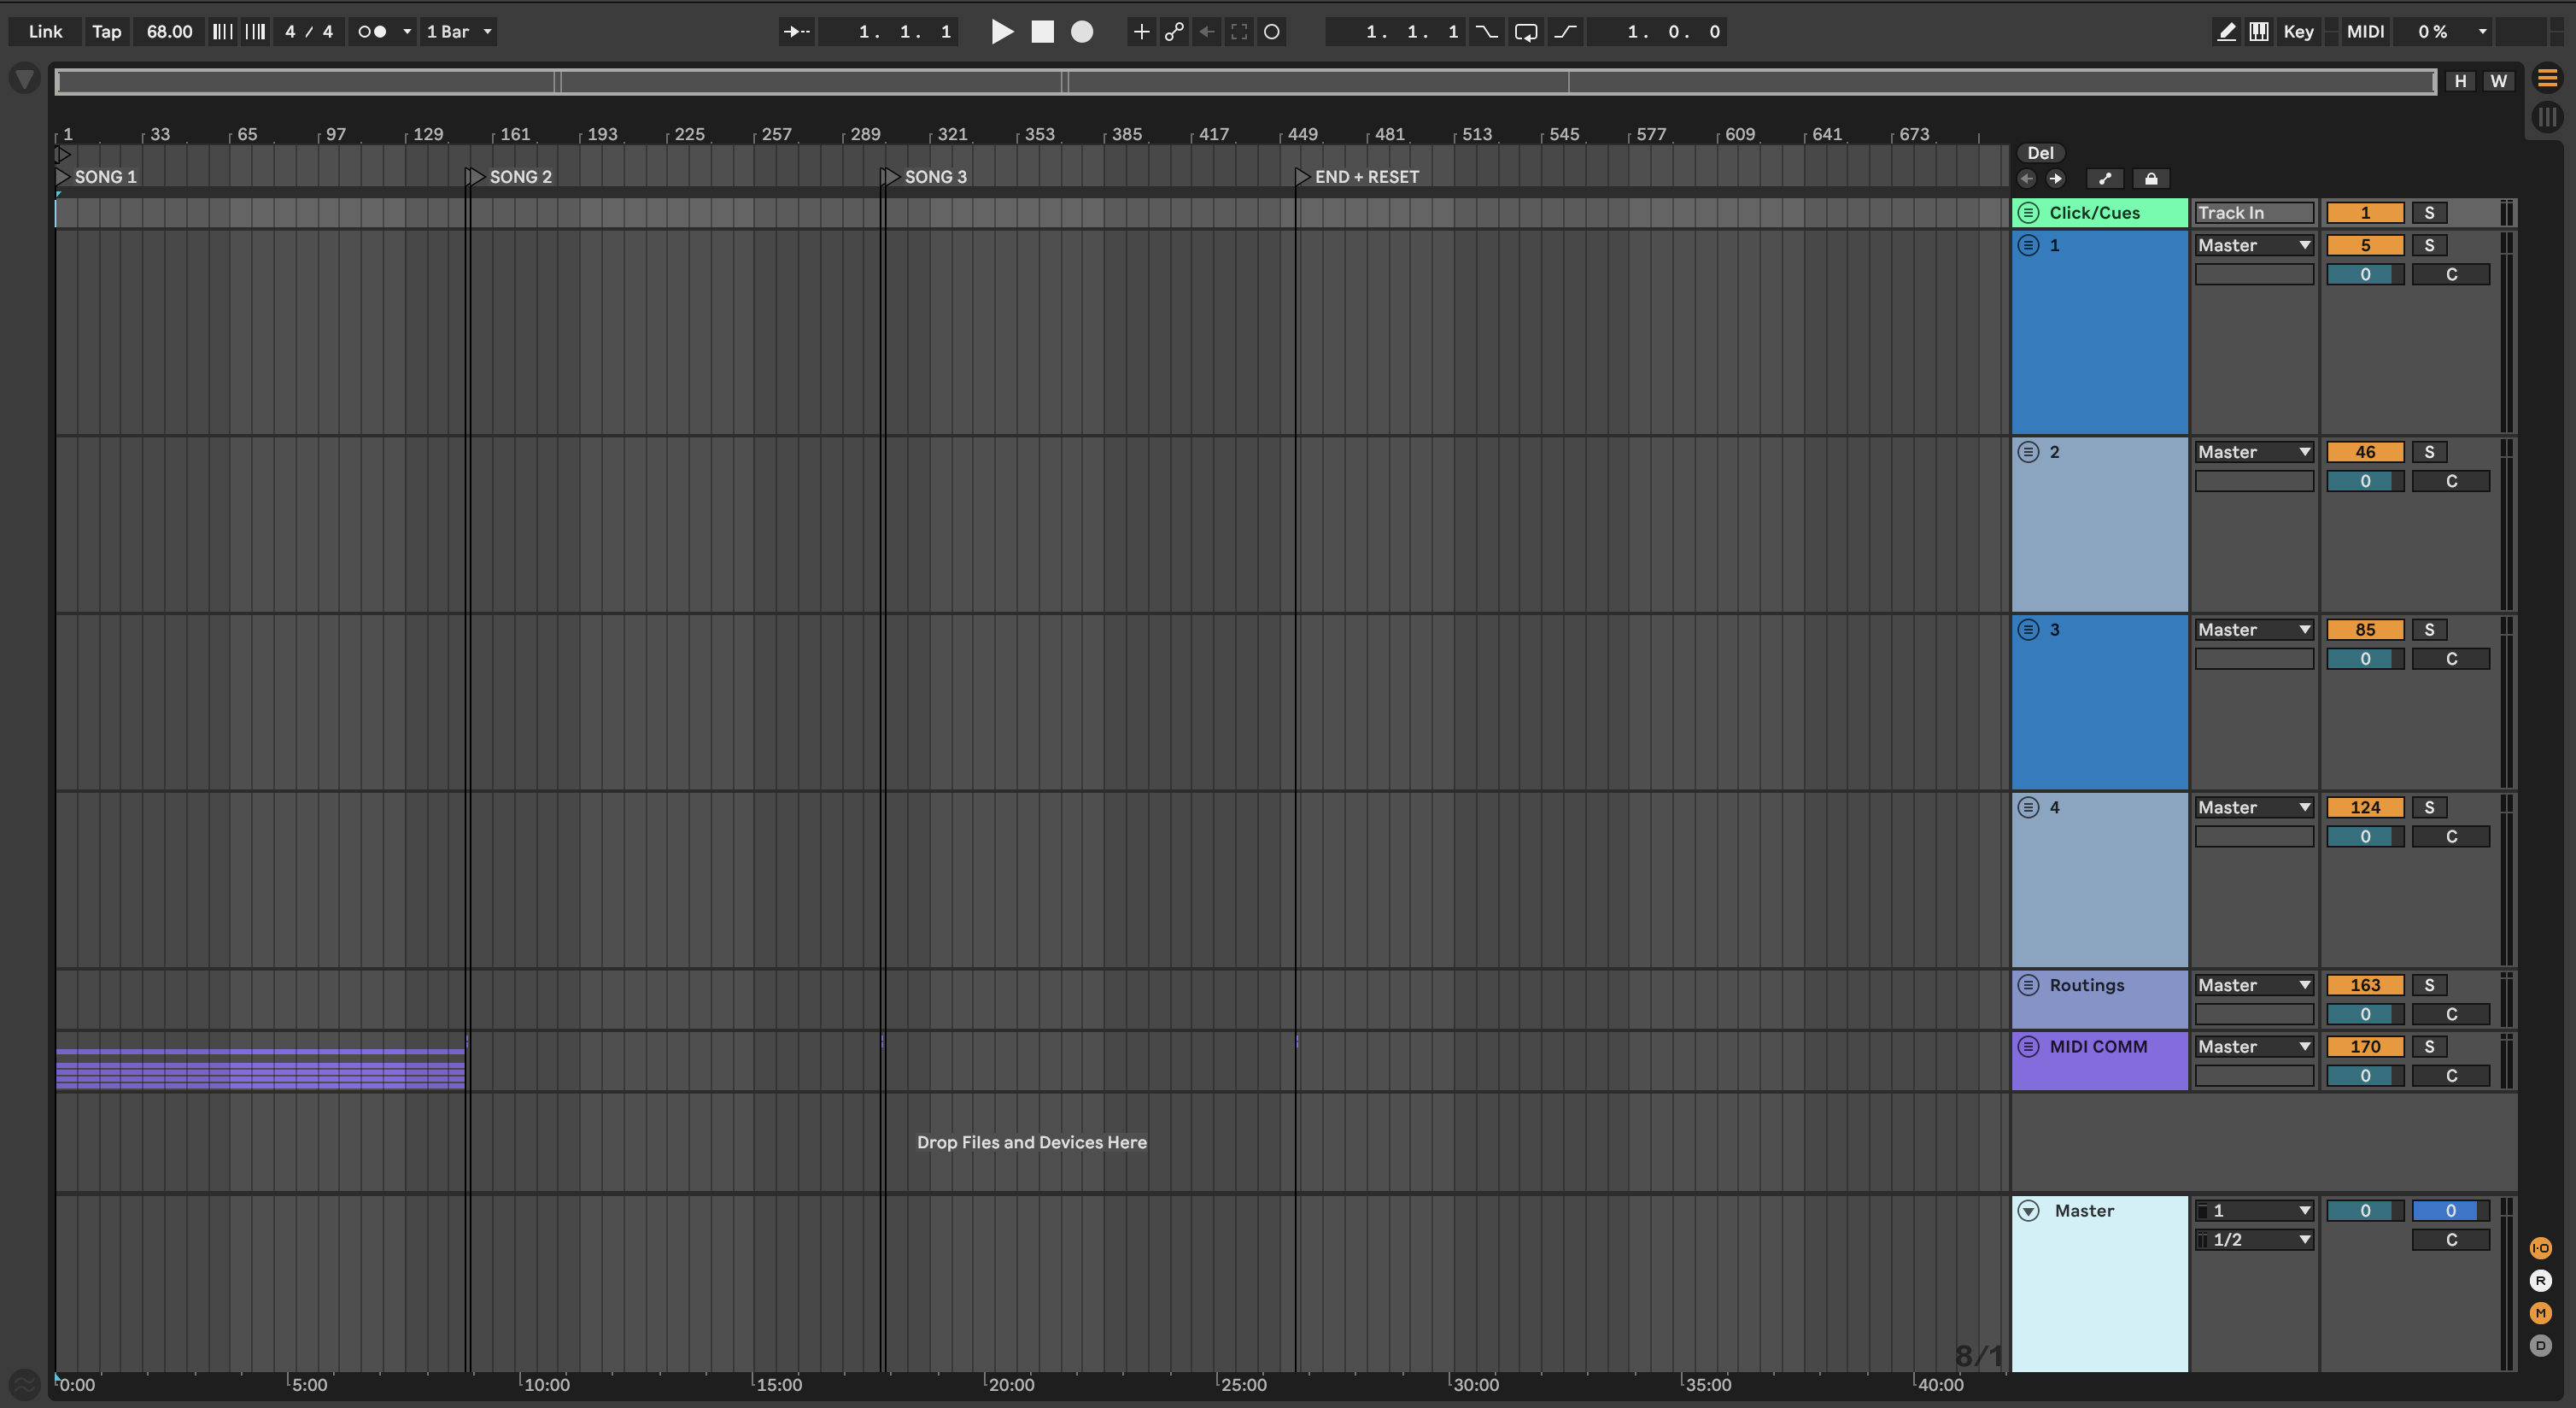
For those who are mildly sadistic and enjoy the thought of a crunchy cookie accompanied by smooth caramel.
To set up tracks playback in this view, you’ll do a lot of scrolling both horizontally and vertically. Arrangement View plays left to right, and a full setlist is usually long enough that it won’t fit in Ableton’s view window. There will also be enough tracks that, to see everything, you’ll end up scrolling up and down throughout your session.
To get the section-marker benefit of this view, you’ll also have to manually go through each song and mark every section with locators. However, this view solves the two limitations of Session View extremely well. You can quickly edit each song however you want—adding time (cmd+I) between sections if you need to duplicate a chorus, trimming out any spans of audio you don’t want, and rearranging parts without fighting the grid.
Once locators are in, it becomes very easy to jump between sections during playback. Because Ableton syncs jumps to the length of a measure, you can select locators and move between sections without getting off the click.
Arrangement View is excellent at solving very real problems, just like smooth caramel solves the too-chewy-caramel problem. Arrangement View is certainly the view you should reach for when you need in-depth edits and the flexibility of easily jumping between sections of songs. Those features are very respectable, which is why—despite the extra setup—Arrangement View is a common choice for multitracks playback engineers.
Outro
Unlike Twix bars, there are real differences between Arrangement View and Session View. Each is an incredibly capable way to play back multitracks, and each stands out in different circumstances and under different constraints.
If you want templates built to make setting up sessions in each view straightforward and consistent, I’m giving away the templates I personally use each week for free. To download, use the link below.
Get the free Ableton template
Download the free template that works in both Arrangement and Session View, and speed up your playback workflow.